Slow Blues Piano for Beginners
Learning Focus
Music Style
Free Lessons
Get free weekly lessons, practice tips, and downloadable resources to your inbox!
You’ve probably heard the sound of the sweet and soulful slow blues piano. It’s so captivating with its ability to tell so many emotions. From expressing sadness and pain, our inner “coolness,” and even creating an atmosphere of romance. No wonder why blues, particularly the slow blues, is so popular. But how do you create that sound if you’re not so experienced at jazz? We’ve got you covered in this tutorial on slow blues piano for beginners.
Many people think that to be good at the blues you’ll need to have years of classical technique under your belt, know many scales, numerous chords, and more. That couldn’t be further from the truth. In fact, with just a few chords, 1 scale, and some improv techniques, you’ll be sounding like a total pro in no time!
In this lesson, you’ll learn:
- 6 rich but simple jazzy blues chords
- 1 easy scale for blues improv
- 3 improv techniques to play your own blues lines, licks, and riffs
- Exercises to practice these techniques, including a sheet music PDF with main points, and a backing track to practice with
- Cool tips and tricks along the way
Excited? Let’s dive in!
Step 1: Learn The Pro Sounding Blues Piano Chords
The first step to learning slow blues piano for beginners is our chords. These chords will set the mood and tone of the style, as well as giving us a nice bed a harmony to lay our improvisations on. Here they all are:

Now it may look complicated, especially those chord names (E7 b13, #9?), but don’t worry! It’s actually quite easy to play, and in time you’ll become more familiar with the “theory” of it all. Let’s break it down a little bit.
There are 6 unique chords in this passage, the last 2 bars are repeating two chords we already played (C13 and G13). Ignoring the rhythm for the moment, try playing each one on its own to get the feel under your hands. The closeness of some of the notes (the rubs) might seem strange if you’re used to 3 note major or minor chords, but it’s an important part of getting this type of sound.
Notice how cool it is that these piano chords tend to flow into each other, many of the notes are close by:


After you get the chords down, try playing the whole passage with the quarter note groove (reference the recording at beginning of this sub-heading).
If you want to learn more about blues piano chords and accompanying, then check out Jazzy Blues Comping (Beginner/Intermediate, Intermediate/Advanced).
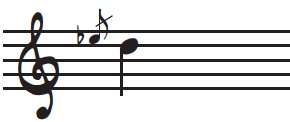
Step 2: Learn The Blues Piano Scale
Here’s what the must-know blues scale looks like in C. Sometimes called the major blues scale (or gospel scale):

Be sure to pay attention to the given fingering. Doing this will help you in keeping the scale under your fingers while playing up and down and improvising. Normally, if playing only 1 octave you can play the top note with a 5 finger. However, if we want to go more than 1 octave the top C will return to a 1 finger instead of a 5.
TIP: You’ll see that the scale is a total of 6 notes, typically broken in two halves using the first 3 fingers on each half (1,2,3, 1,2,3). Try playing the first half of the scale blocked together under your first 3 fingers, then the second half, and repeat all the way up the piano. This will help get the scale to become automatic for you!
If you want to learn more about this scale and different ways to use it, then check out The Major Blues Scale (Gospel Scale) (Beginner/Intermediate, Intermediate/Advanced).
Now we could simply stop here and say that when improvising, you can simply play anything within that scale it’ll sound good. However, if we want to actually sound like a pro, we need to know how to create good lines with this scale.
How do we do that?
Step 3: Creating Good Lines Using 3 Slow Blues Piano Improv Techniques
What is an improvisational line? It actually closely resembles speech. Does rambling on and on to someone without a point or end in sight make for a good conversation? Most likely you’re going to try to take the first exit out of there!
It’s the same with any improvisation, including blues. We need to play distinct musical phrases. Whether these phrases are shorter or longer, we basically just need to add gaps in between each phrase. They need to feel like they have a start and ending point to feel like good music.
Let’s go over 3 techniques and exercises that will help us do that. After getting familiar with each one, try improvising the technique, but with the idea of creating lines as described above. Then you’ll truly be improvising.
#1: 8th notes
The first 2 piano improv techniques for slow blues piano for beginners will get us thinking about rhythm. Practicing specific rhythmic note values will help us keep our improvisations focused and intentional, and away from the endless meandering sound that we want to avoid. The first and most common rhythm to create lines with is streams of 8th notes.
Remember: In this style of blues as well as many styles of jazz, we like to swing the 8th notes. Without getting into the nitty-gritty details of this, there’s an easy way to do it. Simply put, any time you have a group of 2 8th notes starting on a beat, play the first note a little longer than the second note. Boom, you have swing!

To help us in using 8th notes on the blues scale over our chord progression, try the following exercise until it’s natural. It simply goes up, then down using the scale in 8th notes over the chords:

Don’t forget to practice improvising now using 8th notes. You can use one of the backing tracks linked below. Think about creating nice musical lines and don’t be afraid to use the whole range of the piano.
#2: Triplets
Triplets divide up each beat into 3 notes. Here’s a similar exercise to the 8th note one but this time using triplets instead of 8th notes:

After you’re comfortable, again you can try improvising lines with it.
TIP: With triplets, you don’t always have to run up and down the piano. In fact, it sounds quite nice to pick a position and play a repeating blues type pattern:

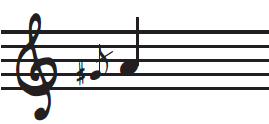
#3: Blues Slides
Piano slides are a staple of blues piano playing. They are usually played by quickly sliding from a black key to a white key on the same finger (a technique that you can just practice and perfect on its own).
We’ll be using 3 specific slides that are great to play and that keep to our blues scale:

Check out this neat little exercise that incorporates all these slides. Keep in mind that it’s easier to keep your thumb on C during the “A slides,” I put a marking in the sheet music:

TIP: Contrary to triplets in #2, blues slides often sound cool jumping large ranges on the piano. When practicing improvising try to slide some notes lower on the piano and get higher, or start higher and get to the lower octaves. This will create some cool blues runs!

If you want to learn more cool soloing ideas, riffs, and licks, then check out The Bible Of Blues Riffs (Beginner/Intermediate, Intermediate/Advanced).
Summing It All Up
I hope you’ve enjoyed this lesson on slow blues piano for beginners! We’ve covered TONS of great info to really get you going. Hopefully, you’ve also discovered that it doesn’t have to be hard to get a blues sound and to start improvising. All you really need are the right tools to get started. Just keep practicing, experimenting, and listening. Then you’ll start to get ahold of the patterns present in the style.
Remember that the PDF summarizing the chords, scale, and exercises is available for download below. There’s also a smart sheet music version for our members that lets you transpose the music to any key with only a click of a button. Lastly, there are also a few backing tracks at different tempos to help you practice and improvise with.
If you want an even deeper dive into the blues and related styles, we have plenty of great courses here at Piano With Jonny:
- The 10-Lesson Blues Challenge (Beginner/Intermediate, Intermediate/Advanced)
- Slow Left Hand Blues Accompaniment (Beginner/Intermediate, Intermediate/Advanced)
- Summertime – Slow Blues (Beginner/Intermediate, Intermediate/Advanced)
- Blues Improvisation Challenge
- How to Create a Blues Solo
That’s it for this Quick Tip. Thanks for reading!
Blog written by Daine Jordan/Quick Tip by Jonny May
More Free Lessons

In this lesson, I’ll show you three techniques that show up again and again in Billy’s playing—and you can start using them in your own music right away.
In this lesson, I'm breaking down one of the biggest solo mistakes players make: using the same rhythms over and over again.
I'm taking apart one of my all-time favorite solo piano performances of Blackbird and breaking down the absolute magic that Jon Batiste is creating at the piano.
Looking for downloads?
Subscribe to a membership plan for full access to this Quick Tip's sheet music and backing tracks!
Join Us
Get instant access to this Quick Tip and other member features with a PWJ membership!
Guided Learning Tracks
View guided learning tracks for all music styles and skill levels
Progress Tracking
Complete lessons and courses as you track your learning progress
Downloadable Resources
Download Sheet Music and Backing Tracks
Community Forums
Engage with other PWJ members in our member-only community forums
Become a better piano player today. Try us out completely free for 14 days!
